Monday, March 20, 2006

Electrical Update


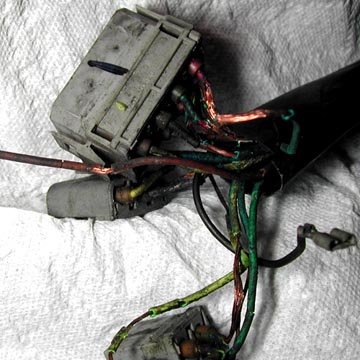
Well, this Saturday I spen the better of 3 hours rewiring my engine harness and I have to say it wasn't the difficult. With the use of the proper tools, the right connectors, and the Volvo electrical manual has made the job fairly easy.

The process began by carefully removing the dry and brittle heat sheild so as no to damage the wires. This was similar to cracking the shells on crab legs! The stuff was so dry and brittle that on occasions I thought I cut my fingers several times. But taking my time I got all the stuff off.

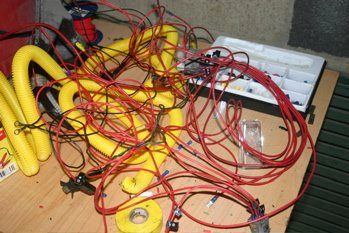
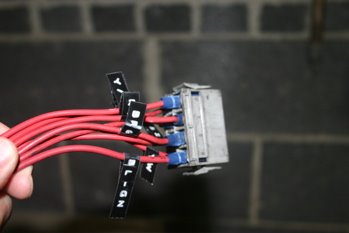
I then proceeded to replace each wire individually making sure the connectors were correct and placed back in it's right spot. By doing it this way I was guaranteed the right length of wire, the connectors, and it's placement. It's mind numbing process but great mediation! Afterwards I tried to recall what I was thinking about during the project but realized my mind was a total blank!

Suggestions to anyone who would attempt this is to make sure you have an assortment of connectors, correct wire gauge, and patience. I'll post some pictures in a little while.

Wednesday, March 15, 2006

Electrical Work


Taking some time to do some needed repair of the VeggieVolvo's electrical wiring. Volvo in their wisdom thought that the car wouldn't last beyond 20 years and made the wiring insulation bio-degradeable. Problem is their cars are still on the road 20 years later and owners are finding nasty exposed wires!

So I've decided to go ahead and begin repairing the wiring harness. I orginally searched for harness's to buy but they ranged from $200 to $450. Needless to say I decided to undertake just doing it my self. For those who may be looking for a Volvo Harness check out Dave Barton for a large selection of Volvo wiring harness's.

I've got to say so far disconnecting and finding replacement connectors has not been that bad. One just has to be careful to remember where all the connections are, if you don't have a Volvo wiring manual. I'll post more later as I go with pictures later.

Thursday, February 16, 2006

Fuel Tank and Heating it

Howdy folks! (for those of you taking the time to visit) Sorry it's been so long since I last posted but life as parent of two toddlers is challenging. What free time there is is usually spent catching up on sleep!

So when I last left off I had explained and compared the two methods of carrying and heating WVO to the engine. Today I'll discuss the fuel tank for the WVO. As you will notice there is a recurring theme here with preheating in the system.

There seems to be quite a few methods that people are using to preheat their WVO while in the tank. Some are actually going to the extent of heating the entire WVO tank to aid in it's pickup and flow through the system. This method seems to widely used in larger installations like in pickup trucks with 40+ gallons of WVO. While this can be done it does take time and if your a city dweller may not be the most practical. The other drawback to this method requires quite a bit of work in bending and placing tubing in the tank.

The other method is quite a bit easier and works just as well and that is to have a heated pickup system. That is rather than heat the entire tank and WVO just heat the WVO around the fuel pickup and as it travels through the system it gets the rest of the heat it needs. To create such a device is rather easy and can be done with off the shelf copper pipe. This method also allows for a variety of fuel tank choices ranging from the plactic cubes the WVO comes in to the plastic marine fuel tanks. I personally have created a system using a 12 gallon Tempo marine fuel tank. I'll post some pictures and diagrams on this soon.

Take care!

Friday, January 13, 2006

Hose on Hose Method


Well, it's been awhile and I still haven't had the time to swap out transmission yet. Soon though! But in the meantime, I thought I would create another installment on the WVO conversion process.

This time I'll provide for another WVO delivery method that is easier and less likely to leak. This method is referred to HOH (Hose on Hose) and relies on the transfer of heat in the engine coolant as it flows through tubing. The process is fairly straight forward in that you have a feed and return of both coolant and WVO that are bundled together. The tubing or hoses are secured together using common plastic zip ties. Most of the tubing/hose is going to be 3/8" rubber fuel hose and your going to need quite a bit of it. In order to retain as much heat as possible you place your HOH setup in foam pipe insulation, readily available at your local hardware store.

The image gives you and idea of what the process looks like and is pretty easy to make. The only drawback to this method is the inefficient heat transfer of rubber. This is a minor issue in that you will benefit from having the coolant and WVO isolated from each other and no possibility of cross contimination due to leaks. This alone is well with considering as any leaks can cause engine damage!